
This article was first published in American Bee Journal, Volume 163 No. 4, in April 2023; a few minor edits have been made to the version here.

Introduction
Queen rearing can sound intimidating — many beekeepers find it easier and safer to shell out $40-60 every time a new queen is needed. But if you live in an area without widespread Apis mellifera scutellata (Africanized) genes, there is a lot of value in creating a self-sustainable bee operation by learning how to rear your own queens. Once the general concepts are understood, it’s not overly complicated and doesn’t even have to involve grafting — in fact, there are some ways to raise local queens that are almost completely passive for the beekeeper. This two-part article covers basic queen-rearing concepts and outlines several different methods of varying difficulty. Give one (or more) a try this year and your colonies can be headed by brand new, locally reared queens.
Queen Rearing Concepts
Biology
It is helpful to first understand how and why bees naturally make queens. Queen bees lay two kinds of eggs: fertilized and unfertilized. The unfertilized, haploid eggs become male bees (drones), and the fertilized, diploid eggs become female bees. Most of the females become workers, but any fertilized egg has the potential to become a queen. For the first three days of life, all female larvae are fed the same diet, after which worker larvae are weaned from that diet while queen larvae continue it. For this reason, it is ideal to choose larvae younger than 3 days old to turn into queens.
Even within those first three days, studies have shown that the younger the larvae are when they start being developed into queens, the more ovarioles (an indicator of queen reproductive capability & directly associated with a queen’s quality) the resulting queens will have (Dedej et al. 1998). What this means in queen rearing is that the highest quality queens result when larvae are selected as soon as possible after hatching from the egg, when they are just starting to curl into a C-shape.

Timelines
A queen’s development timeline is much faster than a worker’s — it takes only 16 days from egg to emergence. This is very important to understand in queen rearing: Since eggs hatch on day 3, and the queens are ideally being created from 1-3-day-old larvae, new queens could be emerging as soon as 10 days after placing larvae into the cell builder colony (and even sooner if older larvae are accidentally transferred). Allow up to 2-3 weeks after she emerges for the virgin queen to mature and mate before she begins laying.
Isolation
Once queen cells are capped, they must be isolated, either by caging in place or transferring to individual mating nucs before the first queen emerges (a week after capping). Otherwise, the first queen to emerge will search out all the other queens still in their cells to sting and kill them. If the cells are in a queenright finisher colony, the first queen to emerge could even kill the finisher colony’s accepted mated queen.
Fragility
Use caution when transferring queen cells. Queen pupae are very delicate and shouldn’t be roughly handled, bumped, turned upside down, cooled, or overheated. It is safest to move them at least four days after they have been capped.
Drones
Drones are also important in queen rearing. Queen rearing must be done in a time of year when there are plenty of drones available to mate with the virgin queens. The offspring of the new queen will carry the genetic traits of both the queen and the drones she mated with; for this reason, it may be advantageous to encourage drone production in colonies that have desirable traits to flood nearby drone congregation areas (DCAs) with those genes. Good colonies can be encouraged to produce more drones by giving them 1-3 frames of drone foundation or comb so that the queen has plenty of room to lay drone eggs. Frames half-filled with worker foundation, or shallow frames in deep hive bodies, can also be used since the bees will often draw out the rest of the frame with drone cells. These drone-raising colonies should be strong, with lots of worker bees, and well fed with both nectar and pollen since a large amount of incoming pollen stimulates colonies to rear drones.
Queen Rearing Preparation and Vocabulary
Equipment
- Cloake Board: A wooden frame with queen excluder and slide-out solid divider. If a single colony is serving as both the cell builder and the cell finisher, use with the solid divider for the cell builder stage, and without when it’s time to convert into the cell finisher. It makes things easy but isn’t required; a simple piece of solid wood can be used for the cell builder colony and a regular queen excluder used for the finisher colony. An image of a Cloake board can be seen on Dadant’s website.
- Queen-rearing Frame: A deep frame with slots on the sides to hold queen cell bars.

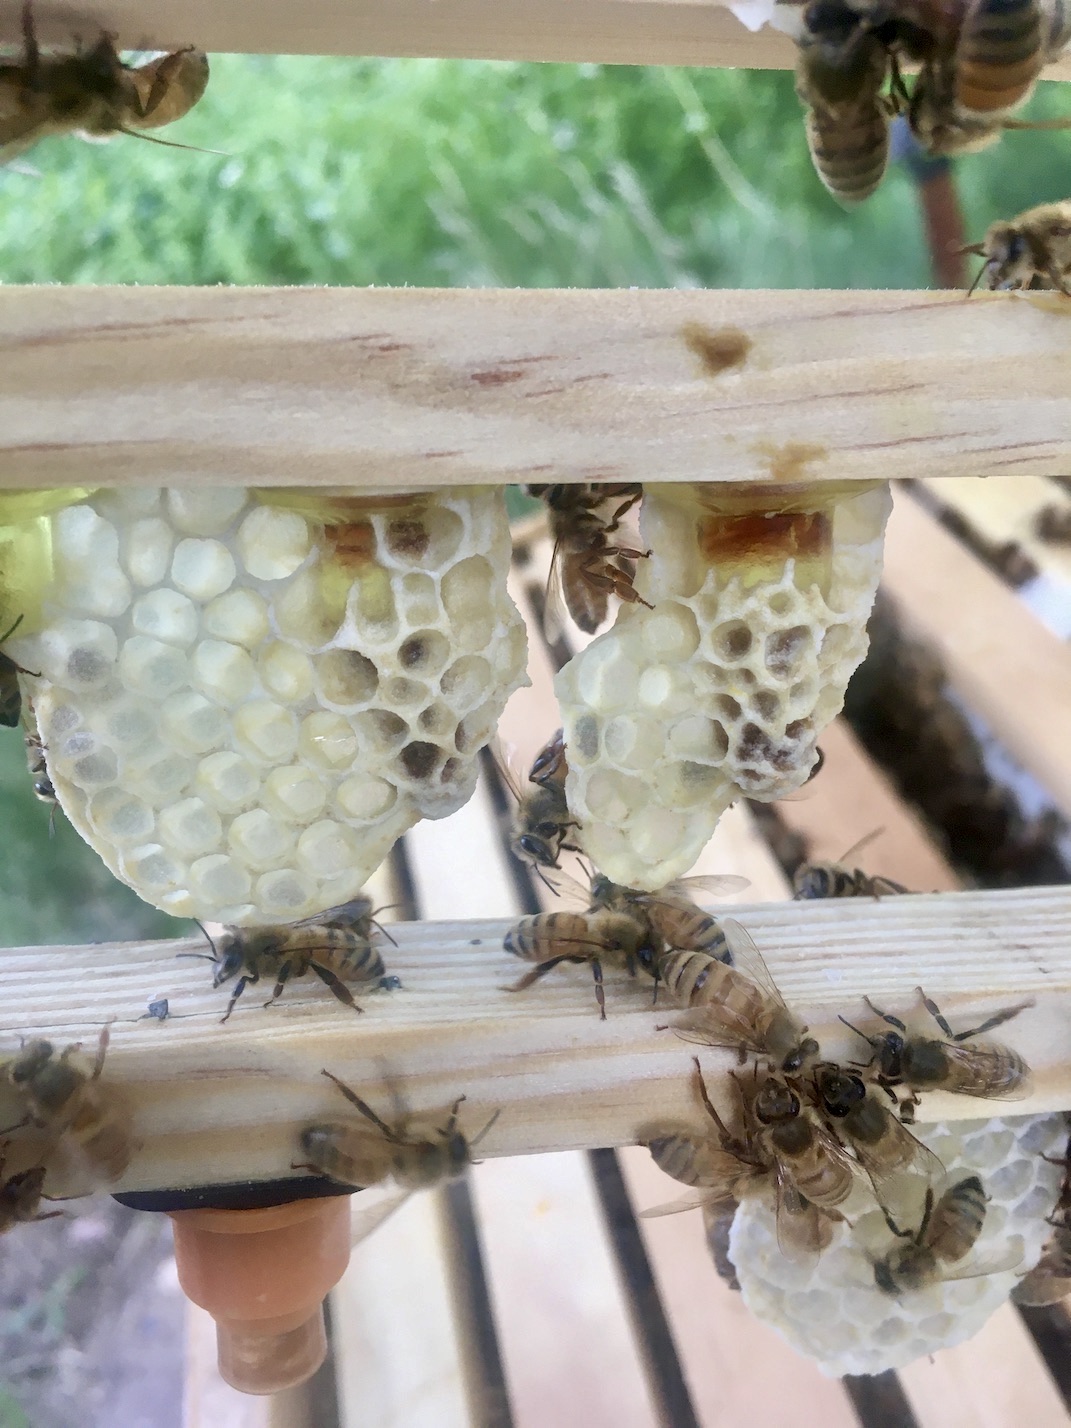
Shown are a queen rearing frame fitted with queen cell bars and cups, with one secured with a queen cell cage. Yellow cups are the wide-based cup style and the black/orange/brown are the cup fixtures that come in a queen-rearing kit.

- Queen Cell Bar: Queen cell bars have a groove down the middle to hold wide-based cell cups. Cell cup holders that come with the non-grafting kits can be attached as well. Cell bars slide into the slots of the queen-rearing frame.
- Queen Cell Cup: The plastic cup that eggs/larvae are laid or grafted into, depending on the method. The knobs on wide-based cell cups fit in the groove of the cell bar. Non-grafting kits come with cups that slide onto separate cup holders that fit onto a cell bar.
- Queen Cell Protector/Cage: A cylindrical cage that can be slid over a capped queen cell (whether within the comb or attached to a queen cell bar) to isolate the virgin queen as she emerges.

A brand new queen peeks out as she emerges from her cell. The cell cage can be seen around the queen cell.

Choosing a breeder colony
For all queen rearing techniques, breeder colonies are chosen which have the qualities desired for propagation in the reared queens. This is up to the individual beekeeper, but could be things like gentleness, propolis production, honey production, hygienic behavior, etc. Very young larvae from these breeder colonies will be reared into queens.
Preparing a cell builder colony
The cell builder colony is the colony that will start building queen cells around the selected young larvae. Honey bees naturally raise their own queens in three different scenarios: swarming, supersedure, and emergency. In queen rearing, conditions need to mimic an emergency scenario so that the bees are triggered to start making queens; namely, the cell builder colony must perceive themselves as queenless. To do this, choose a strong 2-level hive, make sure the queen is in the bottom box, and add a Cloake board with solid divider (or just a solid piece of wood) between the two brood boxes. Make sure both top and bottom have entrances and there are plenty of young nurse bees in the top box. Within a day, the top half without the queen will think they are queenless. The cell builder colony must be well fed so that they are able to provide the queen larvae with lots of royal jelly and start building out the wax queen cells. Feed with syrup for 1-2 days if there is not a honey flow. The queenless cell builder colony will be provided with larvae from the breeder colony using any of the methods described next month in part 2 of this article.
Takes
A day after providing a cell builder colony with young larvae, check back and see how many takes — or successful queen cell starts — there are. A take will be a queen cell starting to be built out with a nice thick layer of royal jelly in the cell.

Choosing a cell finisher colony
Once queen cells are started, the bees will continue making them even in a queenright colony. The bees in a finisher colony will keep feeding the larvae their royal jelly diet and then cap the cells. A finisher colony should be a strong, queenright colony with 2-3 deeps full of healthy bees and an abundance of food so that the nurse bees will be able to produce enough royal jelly — at least 20 pounds of honey, plenty of pollen, and a good honey flow or heavy feeding of syrup are recommended. It could be the same colony as the cell builder if the cell builder meets these criteria — just remove the solid divider board and leave the Cloake board with queen excluder (or replace the solid piece of wood with a queen excluder) to convert it into the queenright cell finisher. The queen must be confined below the queen excluder in the lowest box so she doesn’t try to kill the developing queens, and the frame with the queen cells placed right above the broodnest over the excluder. Within 2-4 days (depending on age of larvae used), the cell finisher colony will have capped the queen cells.
Mating Nucs
No matter which method is chosen to rear queens, there are either capped queen cells or caged cells with emerging virgin queens at the end. After emergence, a queen must mate if she is to lead a successful colony. Mating nucs are queenless nucs, typically with 2+ frames of mite-free brood and bees, 2 frames of disease-free honey/pollen, and a reduceable entrance, although much smaller mini mating nucs can be used as well. The workers in a mating nuc will care for the new queen and keep the colony operational until she is successfully mated.

Create mating nucs up to a few days before they will be needed and make enough to hold the number of queens being raised (one mating nuc for each raised queen). If the nucs are provided with young brood, they may start building their own queens which can be pinched when adding the queen cells, although the bees may tear them down themselves as well once cells are added. If the nucs aren’t made up until the day they are needed, cage the cells for protection for a couple days. It is ideal to keep mating nucs at least a few miles away from the home apiary to prevent foragers from flying back to the colonies they were obtained from. However, it can be done in the home apiary if that is all that is available. In this case, fill them with nurse bees who have not yet oriented to another location and check back a few times to make sure there is a sufficient population remaining and they haven’t all flown back to their original colonies.
Continue on to part two of this article covering how to use the concepts above in various methods for raising queens.
References and Further Reading
Dedej, S., Harfelder, K., Aumeier, P., Rosenkranz, P. & Engels, W. Caste determination is a sequential process: effect of larval age at grafting on ovariole number, hind leg size and cephalic volatiles in the honey bee (Apis mellifera carnica). Journal of Apicultural Research 37:3. Pages 183-190. 1998.
Welsh Beekeepers’ Association. There are queen cells in my hive – what should I do? https://www.wbka.com/wp-content/uploads/2015/04/wbka-booklet-english-PDF.pdf